- Thursday, December 17, 2009
- 5 Comments

Dear Family Circle,
Your recipe is a crock. How could you let me down like that? My gingerbread houses fell in a crumpled heap and I hold you responsible.
I have remained loyal for years. As the recipe books were thinned annually, I kept you along side my beloved Nigella. I extolled the virtues of your Vichyssoise, gingerbread, Chicken chasseur, fish pie and so many others.
However, your royal icing recipe left me cold. I had visions of beautiful snow capped houses made of sweet gingerbread. My sister and I were left holding the walls up, waiting for the icing to take hold. First they fell in, then the roof slid off. I think buttercream would have been a better solution. It would have worked too, if it wasn't 26 degrees in the shade.
I have checked, and your recipe, yes the one next to the ginger bread recipe, uses half the amount of icing sugar compared with other royal icing recipes. My trust is shattered. You're just lucky the ginger bread tastes so good.
Sincerely,
Amy
- Thursday, December 17, 2009
- 3 Comments

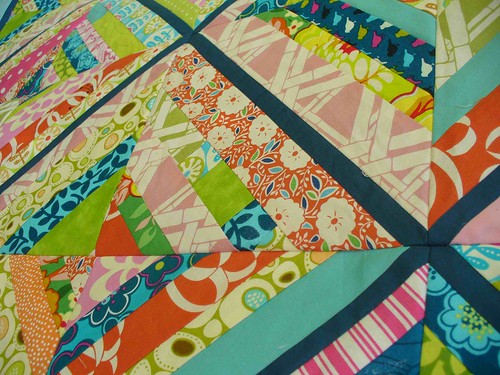
This quilt uses 45 degree triangles cut from string pieced fabric (refer to string tutorial 1). Triangles are then pieced to give 8” finished blocks. This quilt is similar to String with Red Centre from Gwen Marston's Liberated String Quilts
To make these blocks, start with a 45 degree offset when joining the strings. Continue joining the pairs until the fabric is 7” or wider.
Note : To minimise wastage, keep the width as close to 7” as possible (this is the difference between getting 6 or 4 triangles out of a piece of fabric, with more triangles in the narrower). Additionally, 44” long strings give a quicker result as there is less wastage at the ends of the fabric when cutting the triangles.

Cut the strips of string fabric into 45 degree triangles as shown, using either the angles on a ruler or a larger square.

Divide the triangles into two piles.
Cut 1” strips from a contrasting fabric – in this case the teal fabric. Join the 1” wide strips to the long side of the triangles from one pile and press. Next, join the remaining triangles to the other side of the contrasting strips and press. Square up the pairs of triangles to 8 ½”.
Layout the squares and start to assemble the quilt top.
Note: The joining seams are on bias (stretchier) edge of the fabric. To minimise distortion, use a walking foot to join the squares or ease off the pressure on the machine foot.
This concludes the string piecing tutorials for now. Let me know how you get on and if you have any questions, I will try my best to answer them.

- Thursday, December 10, 2009
- 3 Comments

This tutorial explains how string pieced fabric, from string tutorial 1, was used in the “If It’s a Boy” quilt that I made earlier this year. String pieced fabric is cut into squares and rearranged at different angles to create the overall effect.
The quilt uses approximately 3 pieces of 44” long string pieced fabric. The strips were cut from fat quarters and joined with at least one other string to create the full length to increase the number of joins seen in each block.
The first piece was 5” wide and then cut into 5” squares on the straight. The following pieces were slightly wider than 5” (say 6-7”) and the squares were cut at varying angles from these pieces. The remaining scraps were joined and cut to 5” square to create the orphan blocks on the back.

- Thursday, December 10, 2009
- 0 Comments

This tutorial looks at using the strings by replacing a conventional piece of fabric with one that has been created with the strings, as in string tutorial 1. The blocks above have used the string fabric, in place of a patterned fabric, to create the two different patterns.

These Christmas decorations also use string pieced fabric in place of a plain fabric. They were made by creating string fabric to the width of the pattern piece and then cutting the pieces from the string fabric.
- Thursday, December 10, 2009
- 1 Comments

I’ve fallen for string piecing in a big way. It seduced me with the seemingly quick results, hooked me with the unplanned combinations and then reeled me in. This tutorial looks at string piecing without using a foundation to create a string fabric. The following tutorials detail how the string fabric has been used in three different projects, including the blue cross quilt.
Step 1 – Gather Your Strings
 If you are working with leftover strips from another project, sort strips into matching widths. In this case I am working with leftovers from a scrappy hedgerow quilt and have one pile of 1 ½” strips and one pile of 1 3/4” strips. To make up the quantities I then looked for co-ordinating fabrics.
Step 2 –Create Lengths
 Decide on the length of the strings that you will be using. If you are using mainly fat quarters to make up the quantities, use somewhere between 18” & 22”and if you are using widths of fabric, use slightly less than 44”.
Place markers for the chosen length on your work surface. In this case I used black electrical tape on the kitchen table as it can be easily removed when I have finished.
Working through each width, pair up the leftover strings and join until you have you final length.
When a string gets too long, cut the end off and start to use it in the next one.
Step 3- Make-Up Quantities
 Cut strings from your makeup fabrics in a variety of widths ranging from 1 ¼” to 2 ½”. I kept my fabrics in piles sorted my width.
Step 4 – Pair-up Strings
 Join pairs of strings and then pairs of pairs until you have the required width for the pattern you are working with. If you are looking to make angled cuts into your string fabric, where possible, offset the ends to match the angle of this first cut.
Step 5 – Let loose
There are seemingly endless possibilities for the string fabric that you have just made. The next three tutorials explain how strings have been used in three different ways- String as a fabric, String as squares and the Blue Cross Quilt.
Foundation Piecing
Often I haven’t the patience for foundation piecing, however, string piecing using a foundation is brilliant for using a very small amount of left over strips or just one or two blocks. You can find a tutorial to this technique here over a Film in the Fridge.
Conclusion
There it is, string piecing without foundations. I hope you enjoy giving this technique a try. I’d love to know how it works out for you and if you have any questions please let me know.
- Thursday, December 10, 2009
- 1 Comments

As I took up the challenge to use every last scrap of the left over fabrics, this quilt came together. I raided my stash for other fabrics that might bulk up the selection. If you look closely you can bits of beloved Katie Jump Rope patterns, Heather Bailey and even some treasures pink Park slope from Joanna.

I am not a fan of foundation piecing so this one has been put together in strips as I will explain later – bear with we as I get a tutorial together.

I started out with just a desire to use everything up and try something new. For a brief time this quilt was homeless but as I laid out the boarders, Little E told me to “put on my bed”. Now I have to say that this quilt is well and truly spoken for.
- Monday, December 07, 2009
- 4 Comments
It appears, I like the second quilt I make from any fabric, more than the first. Does this happen to anyone else? I think it’s the moments of sewing, staring intently at the fabric and thinking wouldn’t this or that look great too?

As the scrappy hedgerow pattern came together, I found myself wondering what to do with the remaining strips. There was about 5 inches of each that hadn’t been cut into and some other fabrics in my stash that went really well with the remnants.
Slowly the scraps started to come together to make something looking a little like this:

- Sunday, December 06, 2009
- 2 Comments

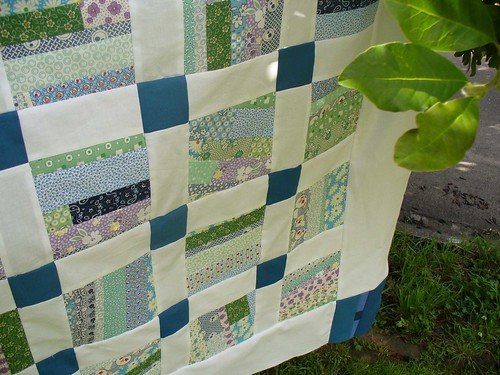
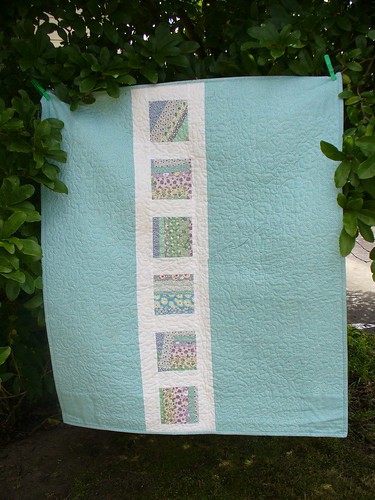
I have fallen for this fabric over and over. First as a dress, and now as a quilt. The little plants and flowers seemed to lend themselves to becoming the centres in some scrappy hedge row blocks. This one was slow in coming as I pieced away 2 hours at a time; A little bit every Tuesday and sometimes, even a stolen moment in between.

I auditioned number of fabrics for the boarders. The usual white appeared a little washed out, and the teal blended in with the barker blue outsides. In the end, I went with these tiny purple accents on the teal.
One Saturday evening as my dearest watched great western movies, I took over the lounge floor and managed to get it together. With a bit of careful dancing around the TV and a number of “What do you think of this layout, Dear?” it finally came together.

As I stepped back I notice one of the blocks is sideways. For the sake of serendipity I will leave it that way as a god block.

- Tuesday, December 01, 2009
- 6 Comments


